
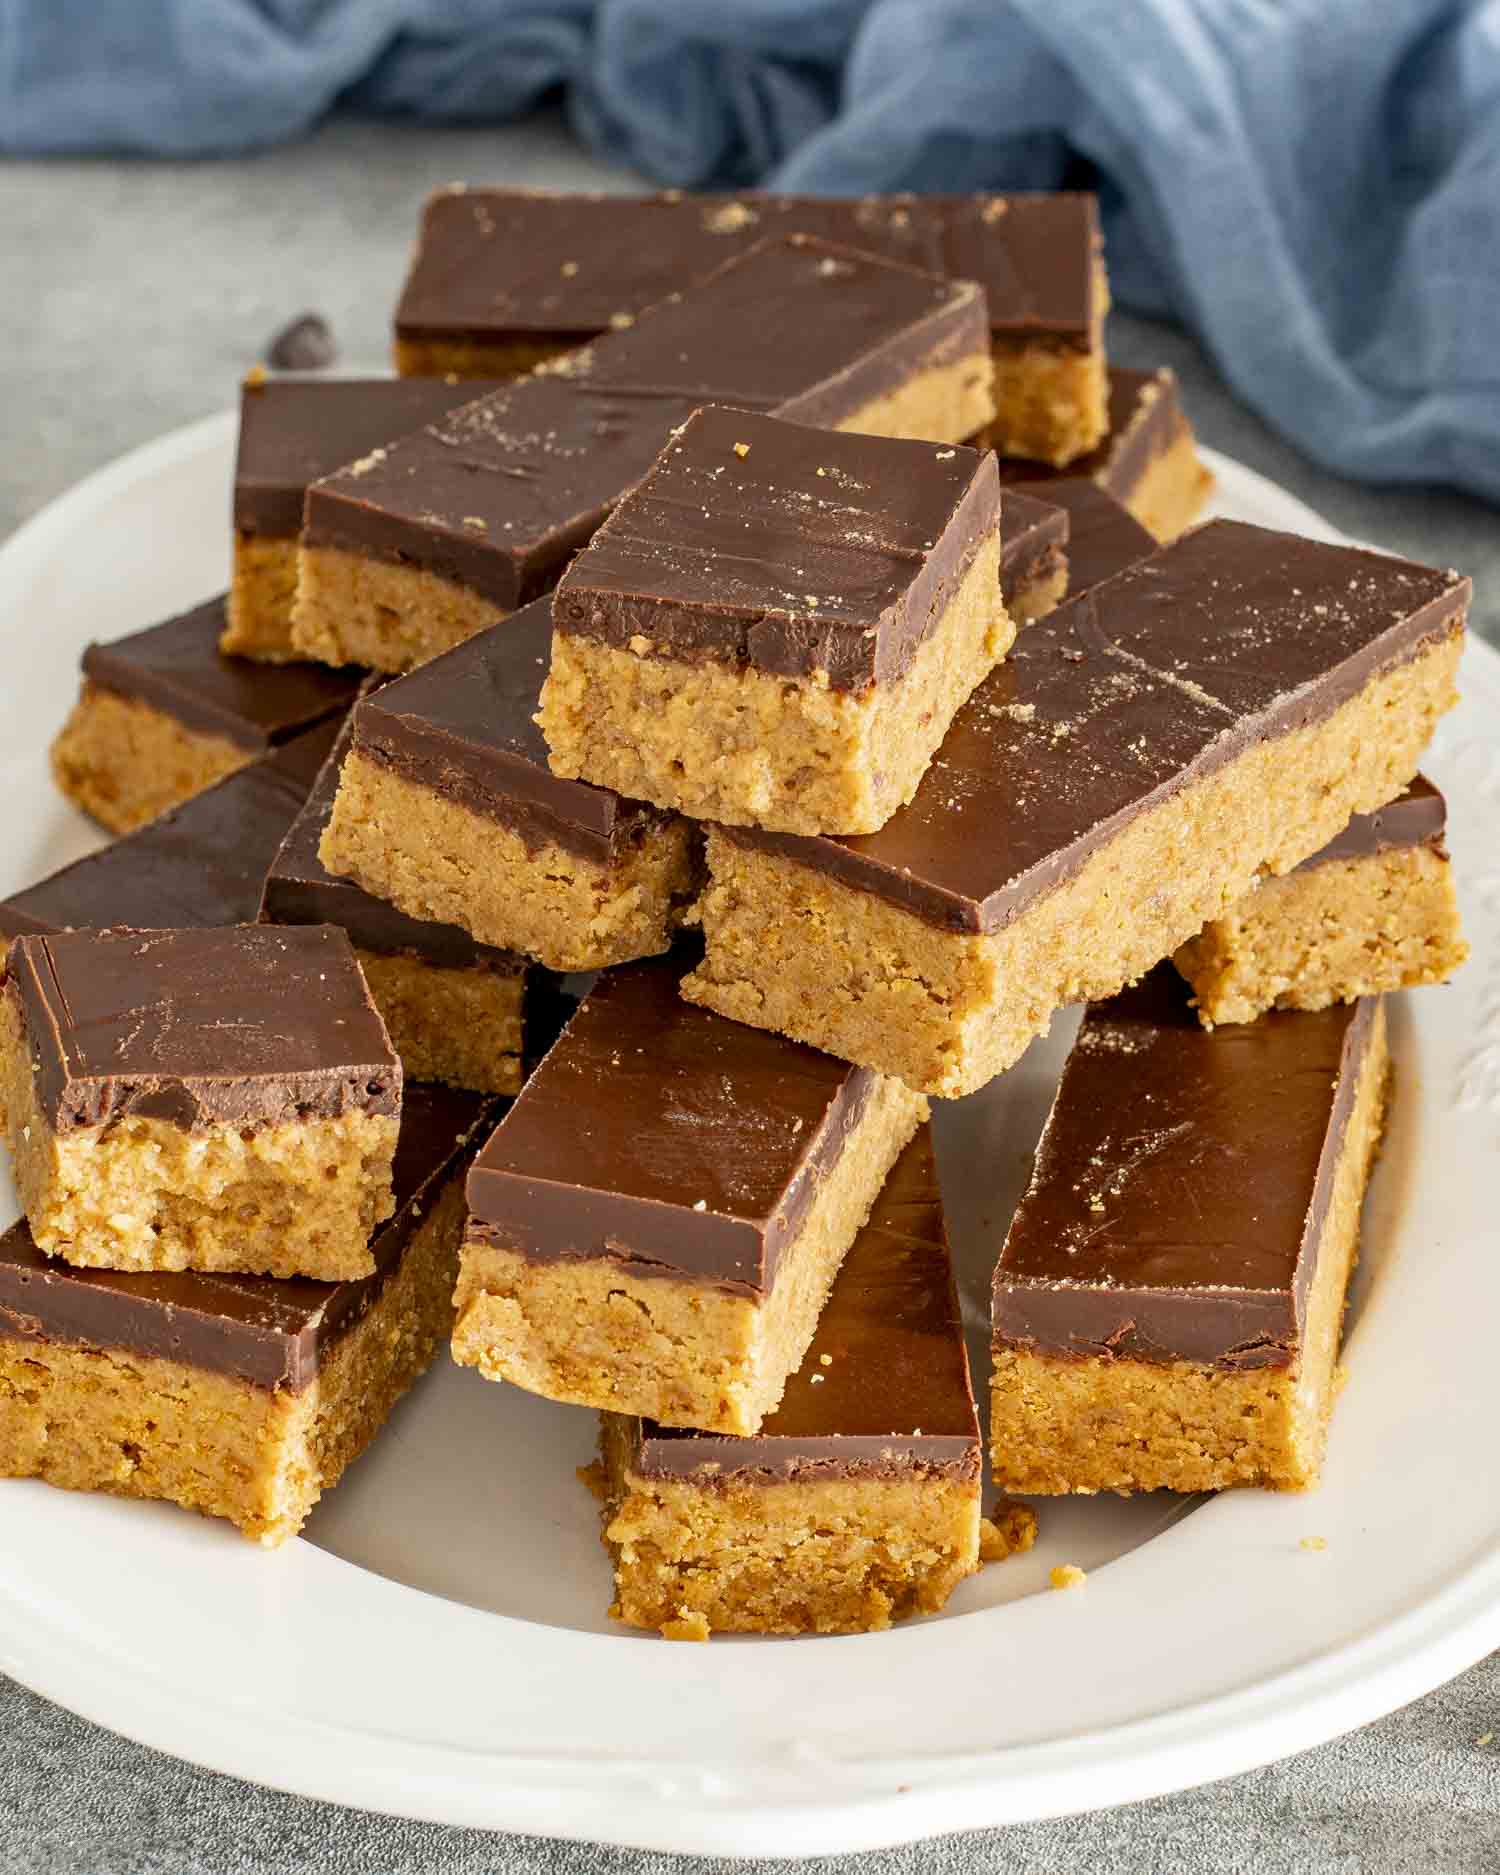
These Lunch Lady Bars are a no-bake stack of peanut butter, chocolate, and bad decisions, pressed into a pan and chilled just long enough to slice. No oven, no mixer, no restraint.

Old-School Lunch Lady Bars
If you grew up eating these at school, you already know. Thick peanut butter base, glossy chocolate on top, and a bar that somehow managed to be both soft and firm at the same time. It didn’t need explaining. You saw it, you grabbed it, and that was that.
If you didn’t grow up with them, this is still very much worth your time. These Lunch Lady Bars are no-bake, low effort, and built on pantry staples that behave exactly as expected. You mix, press, melt, and chill. The result is a rich, peanut butter chocolate bar that cuts clean and holds its shape, which is all a dessert like this needs to do.

Why You’ll Love These Lunch Lady Bars
- No baking required. Just mix, press, melt, and chill. The oven never gets involved.
- Simple pantry ingredients. Nothing fancy, nothing hard to find, nothing pretending to be something else.
- They slice clean. Firm enough to hold their shape, soft enough to bite into without a struggle.
- That peanut butter chocolate combo. It works for a reason and never needs updating.
- Perfect for making ahead. They set in the fridge and are ready whenever you are.
- They disappear quickly. Always a good sign with a dessert like this.

Key Ingredients and Tips

- Graham cracker crumbs: These give the base structure and classic texture. Digestive biscuits or vanilla wafers also work.
- Powdered sugar: Sweetens and binds the base. Granulated sugar won’t give you the same result here.
- Creamy peanut butter: Regular, shelf-stable peanut butter works best. Almond or cashew butter can be used, but avoid natural styles.
- Melted butter: Holds everything together and adds richness. Salted butter is fine, just ease up on the added salt.
- Vanilla and salt: Small amounts, big impact. Don’t skip them.
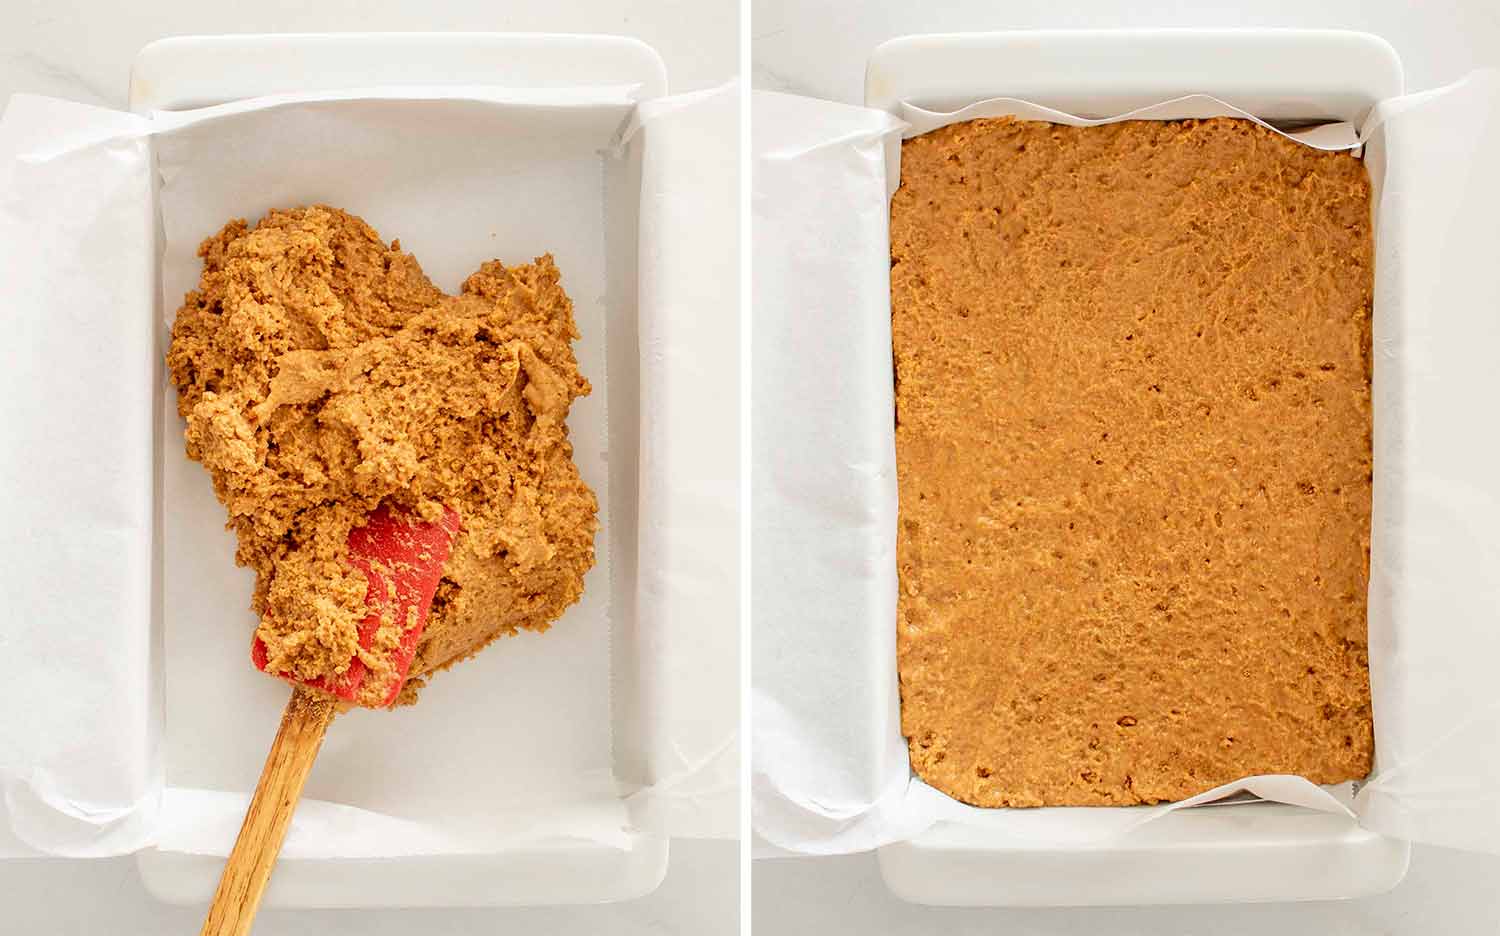
- Press the base firmly: This helps the bars hold together and slice clean.
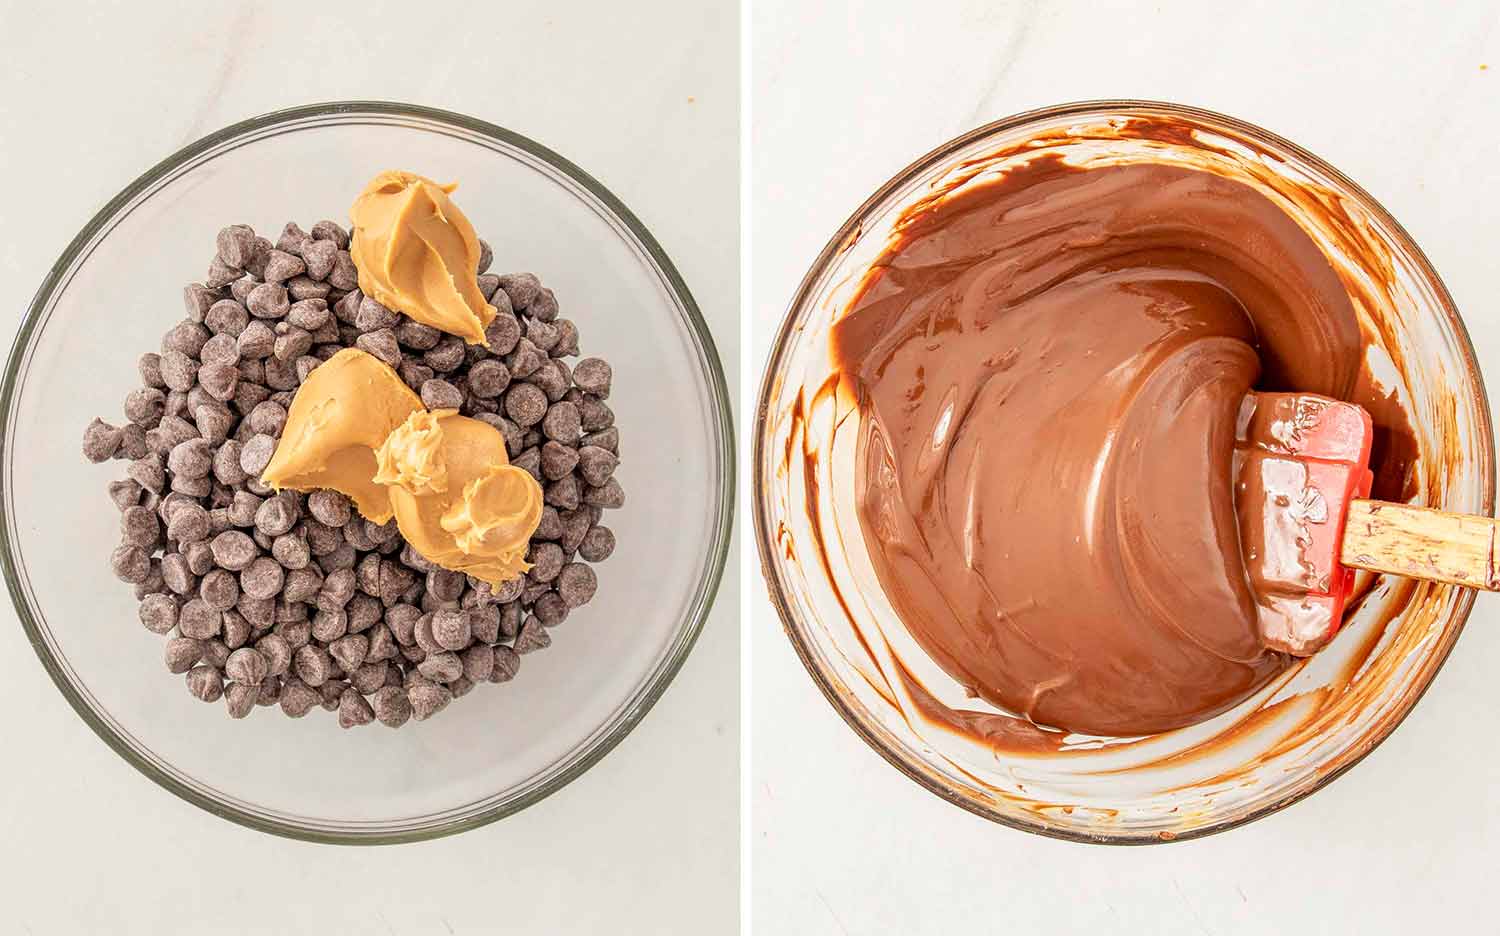
- Chocolate topping: Semisweet is classic, but milk chocolate or dark chocolate both work depending on how sweet you like them.
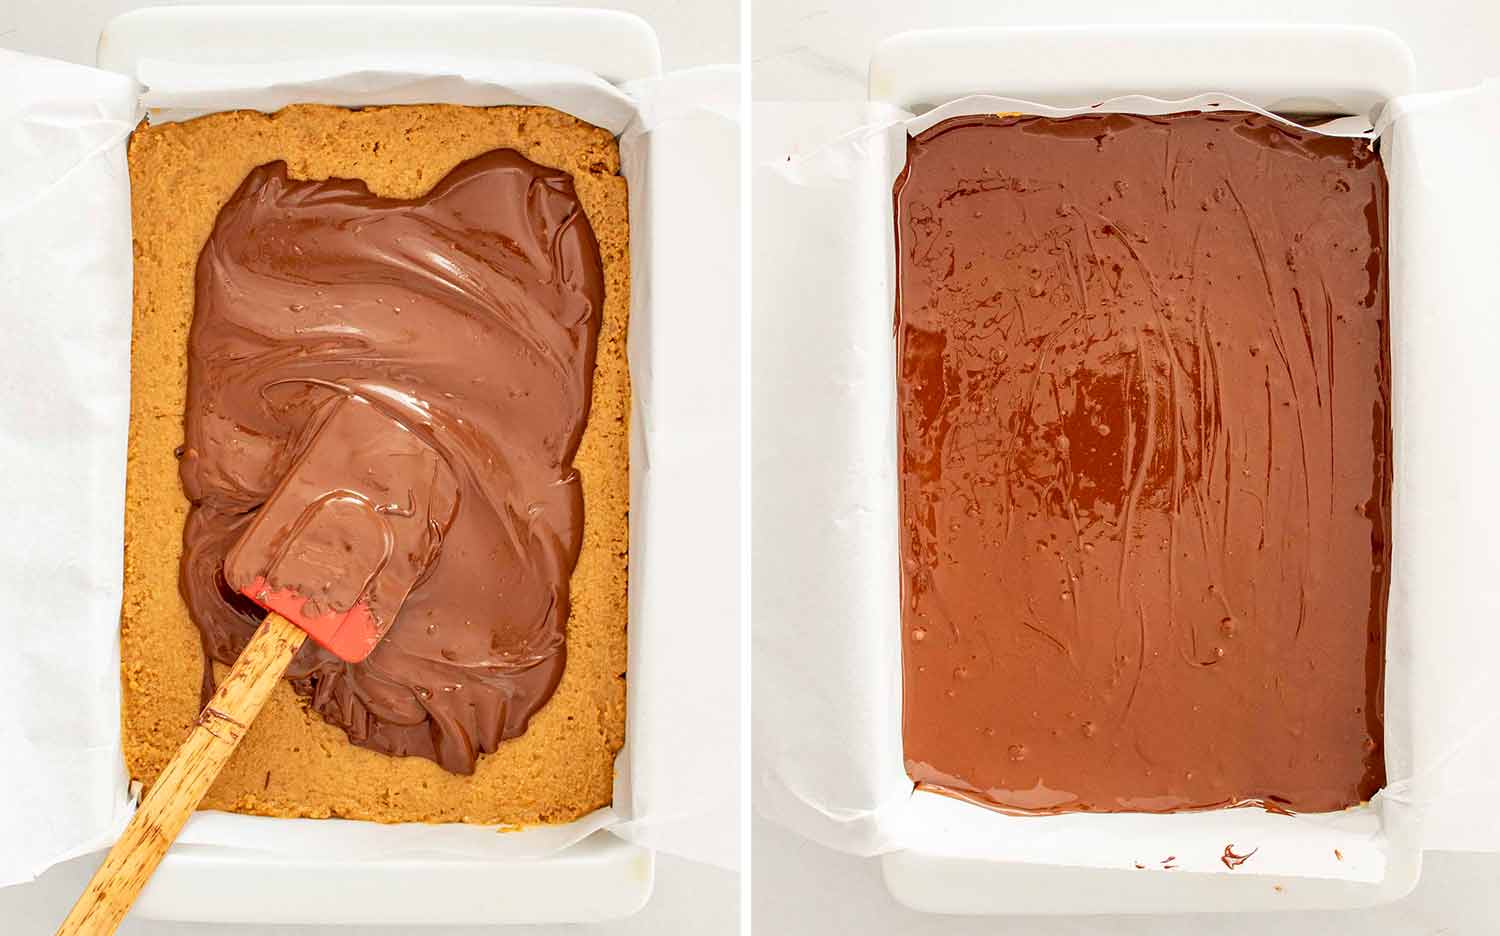
- Give them time to chill: An hour in the fridge helps the bars set properly so they don’t smear when sliced.

Serving Suggestions
These bars don’t need much help, but they show up well in a few situations.
- Cut into small squares and set out on a dessert table. They’re rich, so smaller pieces make sense.
- Serve straight from the fridge for cleaner slices and a firmer bite.
- Bring them to a potluck or bake sale. They travel well and don’t fall apart.
- Keep them on hand for snacks. One square goes a long way. Two is still reasonable.
- Pair with coffee or milk. Simple, familiar, and exactly right.

Frequently Asked Questions
Yes. They hold their shape best when kept in the fridge.
Stored in an airtight container in the fridge, they’ll keep for up to 5 days.
Yes. Freeze them in a single layer or with parchment between layers for up to 3 months. Thaw in the fridge before serving.
Absolutely. They’re actually better once fully chilled, which makes them a great make-ahead dessert.
This usually comes down to not pressing the base firmly enough or using natural peanut butter. Both affect how the bars set.
You can reduce it slightly, but the powdered sugar helps bind the base. Cutting too much will affect texture.
Not necessarily. They’re easy to slice when cold and soften slightly as they sit out.
Try These Recipes Next

Lunch Lady Bars
Ingredients
For the Peanut Butter Base:
- 2 cups graham cracker crumbs
- 1¾ cups powdered sugar
- 1 cup creamy peanut butter
- ¾ cup unsalted butter, melted
- 1 teaspoon vanilla extract
- ½ teaspoon salt
For the Chocolate Topping:
- 1½ cups semisweet chocolate chips
- 3 tablespoons creamy peanut butter
Instructions
- Line a 9×13-inch pan with parchment paper, leaving some overhang for easy lifting later.
- In a large bowl, stir together 2 cups of graham cracker crumbs, 1¾ cups of powdered sugar, 1 cup of peanut butter, ¾ cup of melted butter, 1 teaspoon of vanilla, and ½ teaspoon of salt. Mix until fully combined and thick.

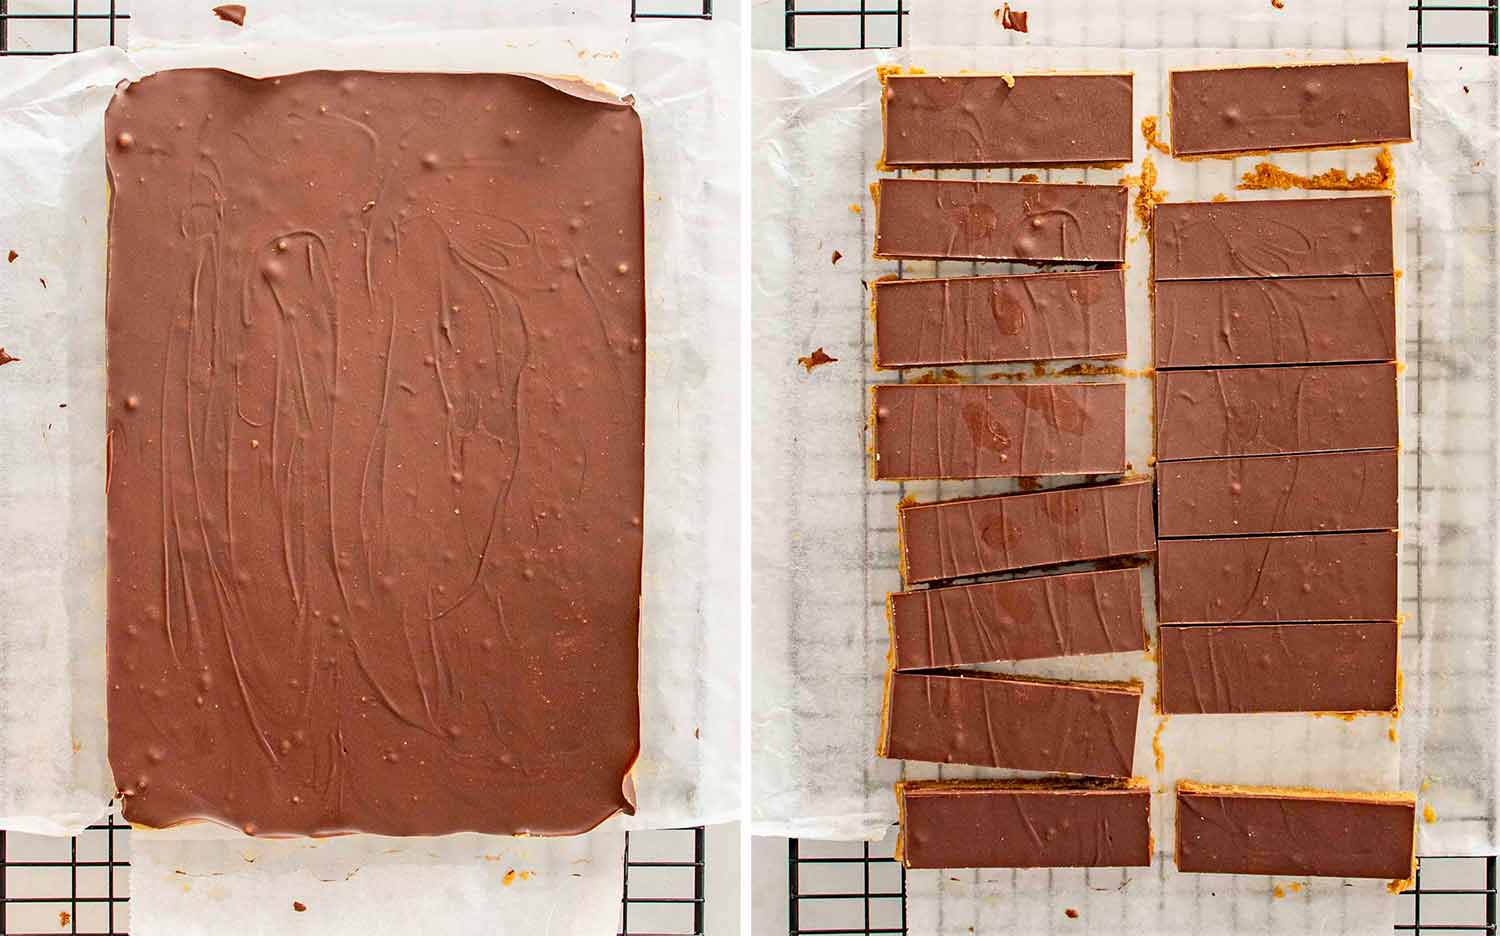
- Transfer the mixture to the prepared pan and press it firmly into an even layer. Really press, this helps the bars hold together.
- Add 1½ cups of chocolate chips, and 3 tablespoons of peanut butter to a microwave-safe bowl. Microwave in 30-second intervals, stirring each time, until smooth.
- Spread the chocolate evenly over the peanut butter base. Refrigerate for at least 1 hour, or until fully set.
- Lift out, slice into bars, and try not to eat half the pan standing at the counter.
Recipe Notes
- Press the base firmly into the pan so the bars hold together when sliced.
- Use shelf stable creamy peanut butter so the base sets properly.
- Chill for at least 1 hour before cutting for clean edges.
- Store leftovers in the refrigerator in an airtight container for up to 5 days.
- Bars can be frozen for up to 3 months and thawed in the fridge before serving.


Leave a Reply